How to Change Fonts in WordPress (+ Font Size & Color)
Contents
Like colors, images, logos and other elements, choosing the right fonts for your website is a central part of web design and branding.
But what do you do if you are not happy with the default fonts that your WordPress theme provides? How do you change fonts in WordPress?
Thankfully, most WordPress themes come with built-in options to change fonts. If you don’t see these customization options in your WordPress theme, don’t panic.
In this post, I’ll show you how to change font in any WordPress them in 3 ways. Then, even if your theme doesn’t have the fonts that you want, you can change it to the one you want.
3 Ways to Change Fonts in WordPress
When it comes to changing fonts in WordPress by hand, they usually involve one these three options: Using WordPress customize, using Plugins or using HTML + CSS. There are pros and cons to each method and which one is the right one for you depends on your setup. Now, I’ll go through each of them in detail.
Method 1: Change Font in WordPress Theme Using the WordPress Customizer
The first thing to check when you want to change fonts is if the theme you use has the option to do it. If it has, you’ll be able to find it in your WordPress dashboard. To check it, the first step is to go to Appearance → Customize.
However, please note that the WordPress theme customizer’s functionality depends on the theme you’re using. So, as each comes with a different set of customization options, you may or may not be able to change the font style.
Plus, there are thousands of themes available for WordPress. And it is hard to tell how rich or poor the fonts options are in the specific theme. Some themes may offer very limited options, while others have feature-rich tools to modify every bit of your fonts.
If your theme has the option to change the fonts, follow the steps below to change it.
Step 1. Logging into the WordPress Dashboard > Clicking on Appearance > Customize. You’ll see a section for Fonts or Typography.
Step 2. Configure the default font for your body text and your headings, as well as any buttons.
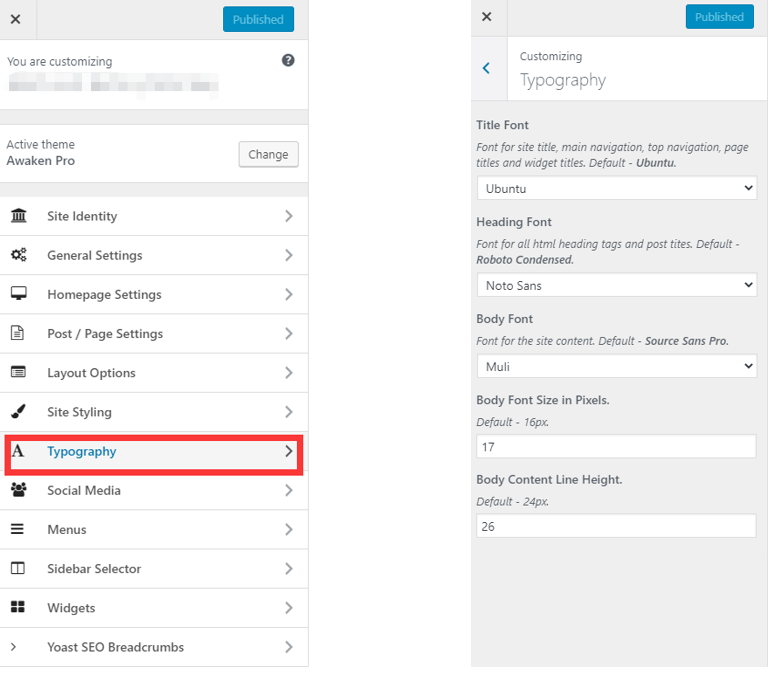
Step 3. Once you change the settings for your typography, don’t forget to save the changes in the theme customizer. After that, all fonts on your site will be changed automatically.
Method 2: Using “Fonts Plugin” to Change Fonts
If your theme’s Customizer does not allow you to do typography or text-color changes, what else can you do? Use WordPress plugins could be the easiest way to change fonts in WordPress.
There are several plugins that can be used to change fonts in WordPress. Here, we choose the free Easy Google Fonts plugin as an example.
Easy Google Fonts works with any WordPress theme and lets you choose from the over 600+ free fonts that Google Fonts offers. Now, I’ll show you how it works.
Step 1. Go to Plugins > Add New and search for Easy Google Fonts. When you’ve found it, install it, and then activate it.
Step 2. Now, when you go to your customizer you’ll see a new Typography tab, which enables you to alter the font and all other type settings for each kind of typographic element in your website
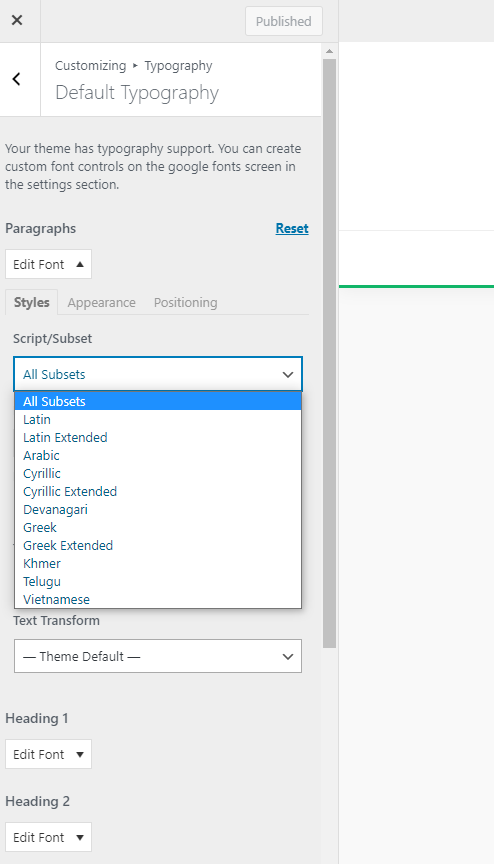
Step 3. Once you’re happy with your choices, click Publish to make your new fonts live.
Method 3: Change WordPress Fonts Using CSS
While the above method is great for a beginner, the “CSS” way might be a litter bit complicated.
Changing the font size using CSS requires adding lines of codes. You can do this via the Theme Editor or Customizer. But, we recommend the customizer as it is the easier method.
Follow the steps below to change fonts on your whole website.
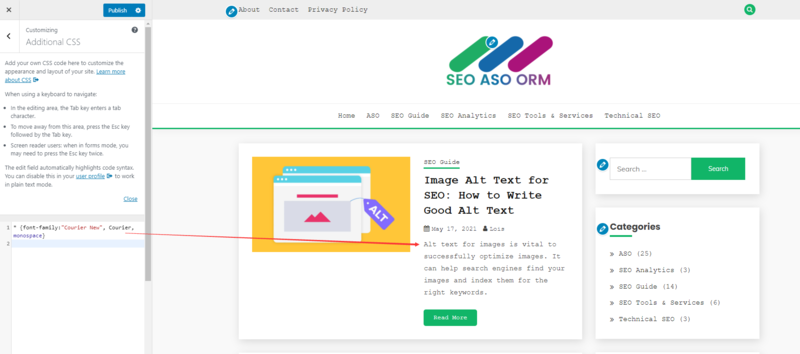
Step 1. Go to the WordPress dashboard, then to Appearance > Customize.
Step 2. Choose Additional CSS.
Step 3. Click in the field and then add your font family code. Here’s an example of the code you can add to change the font of whole site:
* {font-family:”Courier New”, Courier, monospace}
You’ll immediately see the changes on the preview on the right-hand side of the screen.
Note: Here is just an example, so make sure that you change the fonts according to your needs.
- You can change your heading font with the following CSS code:
h1 {
font-family: ‘Lato’, Georgia, serif;
}
- And if you want to change your paragraph font, use this CSS code:
p {
font-family: ‘Lato’, Georgia, serif;
}
- Additionally, you can change the font-weight, font-size, font-style according to your needs.
| Font Properties | Common Values | CSS Examples |
| font-family | Lato, Georgia, serif | body {font-family: Georgia; serif;} |
| font-size | px, %, em | body {font-size: 14px;} |
| font-style | Italic, underline | body {font-style: italic;} |
| font-weight | bold, bolder, normal | body {font-weight: normal} |
Step 4. Your font will immediately change when you paste in the correct code. In order to save your changes, you will need to click on the blue Publish button.
How to Change Font Colors, Size and Style in WordPress
Now, let’s make some font changes to the text inside a blog post using the WordPress Default Editor – Gutenberg. Here are the steps:
Step 1. Open a post or a page you want to edit.
Step 2. Hover over a piece of text.
- From the toolbar that shows up, you can change text alignment, thickness, and also assign text types: from paragraph to H6.
- From the menu on the right, you can change the fonts size and color easily.

Step 3. Don’t forget to hit “Update” and “Publish” when you’re done.
Bonus: How the Find the Best Web Fonts for Your Site
It may be easy to change fonts in your website, but you may have a tough decision before doing this.
Which fonts to use? Which font is better for your website?
Here are some tips to help you find and choose the best fonts for your site.
- Learn the basics of font classification. The art of typography is rich and complex – ranging from legibility to text alignment and spacing. As a start, focus on the most important classification first: the serif, sans serif and script fonts. Here’s a quick summary of each one, and when to use them:
Serif fonts: A serif is a small line at the end of a stroke in a letter or symbol. Serif fonts are considered classical and elegant, and are mostly associated with print. Examples include Times New Roman, Georgia and Bodoni.

Sans serif fonts: These are fonts without serif lines at the end of their letters. Sans serifs are clean, modern and often neutral-looking, making them a great fit for web design. Examples include Madefor font, Helvetica, and the infamous Comic Sans.

Script fonts: Scripts, including cursive fonts, are modeled after handwriting styles. It’s best to keep this style limited to titles only, as writing your body text in script would most likely present a challenge for your audience. Examples include Lobster and Lucida Handwriting.

2. Using a web-safe font – to make sure your readers can view content easily in all devices and your website’s performance is not negatively impacted.
Tips: “Web Safe Font” is used to describe a font that is universally installed across all devices. Since they are stored locally, your website should load faster when you use a web-safe font.
3. Stick to fonts that are easy to read for body text, and use more interesting fonts for headlines if you want.
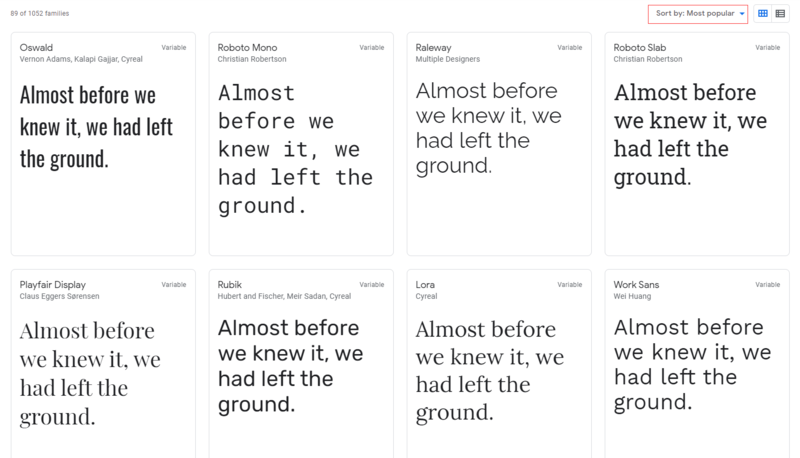
4. Pick from the most popular Google fonts – these will be familiar to website visitors and are easy to read.
5. Carefully consider the purpose of your web design, as well as the type of audience that you want to attract. Then, see if the styling of that typeface you’re considering corresponds with the general message that you want to convey to your visitors.
6. From a branding perspective as well, using the right font that aligns with your brand’s image is vital.
7. When picking the number of typefaces for your website, my suggestion is to aim for no more than three different fonts. The more fonts you have, the harder it will be to harmonize them all together. Also, if you use a lot of different fonts on a page, they will have a negative impact on page load speeds.
Summary
It is a great idea to change fonts in your website to improve the design, branding and user experience.
Above, we have shown you how to find and choose the right fonts for your website and how to add them in your WordPress website. From now on, customizing your WordPress typography is totally in your hands.