Ultimate Guide to Set Up Conversion Tracking in Google Analytics
Contents
Do you use Google Analytics to track visitors and pageviews to see how much traffic your website got? However, it is more important to track conversions.
What’s website conversions?
Conversions are actions you want customers to take on your website…the bottom line KPI’s you define in your measurement plan.
For example, on your website, you have key actions that you are driving people to take: you want people to click buttons, watch videos, fill out forms, add products to carts, etc. But most of all, you want to know how many people take those actions, and when.
Whether you want to track leads, sales or just understand what traffic sources are contributing to your bottom line – you need the right tracking in place.
Google Analytics can be used to track conversions when these actions take place.
Today, I am going to show you how to track conversions with Google (Universal) Analytics and Google Analytics 4. This guide will tell you everything you need to set up, adjust, test, troubleshoot, and monitor your Google Analytics Goal setup.

Why It’s Important to Track Your Conversions
Conversion tracking is essential for every type of website, from e-commerce sites to even affiliate marketing blogs. With conversion tracking in Google Analytics, you’ll be able to judge the performance of your sales and marketing efforts and make smarter decisions about where you should be spending your time and money.
By setting up conversions, you can track metrics like:
- Number of conversions.
- Conversion rate of your website.
- Which marketing campaigns drive the most conversions for your business.
- At what point of the funnel users drop off (you’ll have to set up funnels first to document the user path – we’ll show you how below).
How to Set Up Google Analytics Goals (Conversions)?
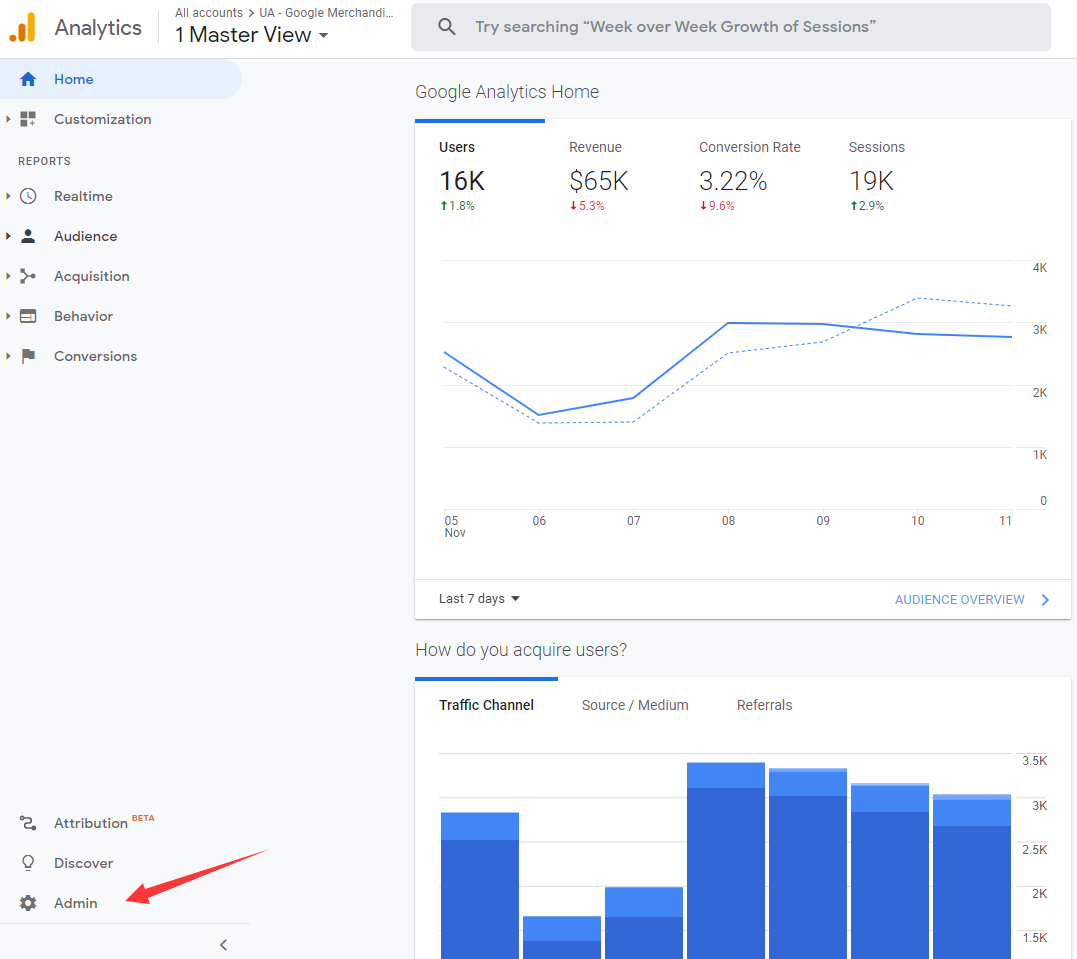
Step 1: Go to Your Admin Panel
Once you’re logged in to your analytics, you’ll need to click on the Admin button in the bottom left corner.
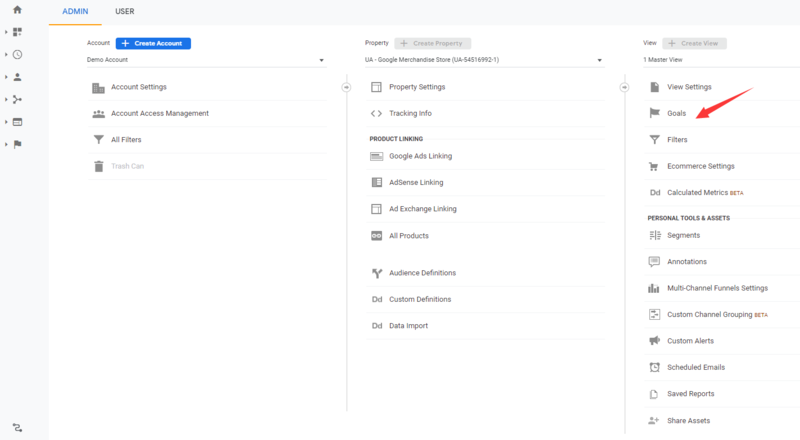
Step 2: Go to “Goals”
You will be presented with three separate columns ‘Account’, ‘Property’ and ‘View.’
In the ‘View’ column (it’s the last column) select ‘Goals’.
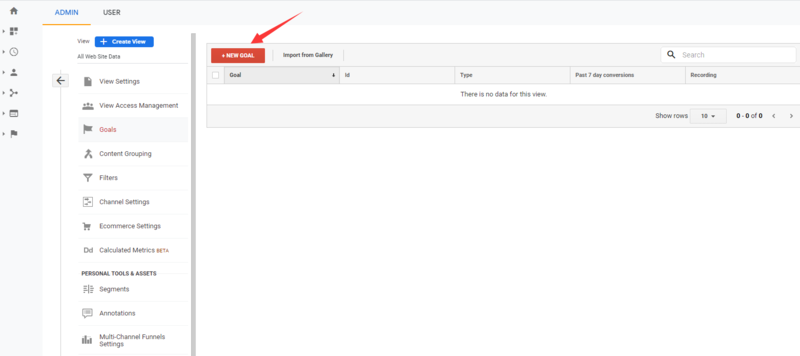
Step 3: Create New Goal
This is relatively self-explanatory. Assuming you have no existing Goals (or are new to Google Analytics), you’ll see a big red button saying “+ New Goal”. Hit that, and you’ll be on your way to setting up your first goal.
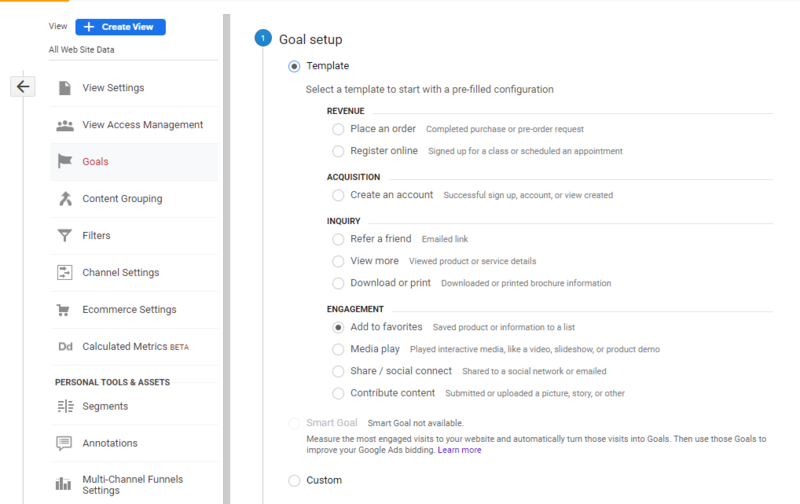
Step 4: Choose A Template or Customize It
You can choose a goal from Google’s templates, or create a custom goal.
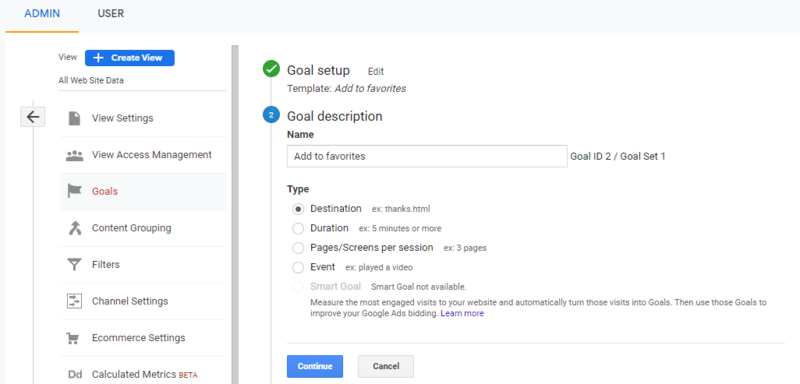
Step 5: Choose Your Goal Type
Next, you’ll need to give your goal a Name and select a goal type. Make the name of goal something clear and descriptive enough that you know what it is at a glance.
Google Analytics supports four different types of customized goals:
- Destination goals, which are completed when a user visits a specific web page or URL. This goal type is perfect for tracking how many people land on your thank you pages, order confirmation pages, add to cart pages, or whatever pages you want to count as a conversion.
- Duration goals, which are related to the total duration of a user session. This is good for tracking user engagement on your site.
- Pages per session goals, which are completed when a user visits a specified number of pages in a single session. This is great for measuring site engagement, as well as pinpointing sections of your website that may need improvements.
- Event goals, which are completed when the user triggers a specified on-site event, such as downloading a file or playing a video.
Step 6: Add Goal Details
Finally, you’ll need to add in the details about your goal. There are a lot of important entries here that you must accurately complete.
Event goals are the most complicate one. To set up an Event Goal you first need to set up the specific interaction as an Event using an Event Tracking code.
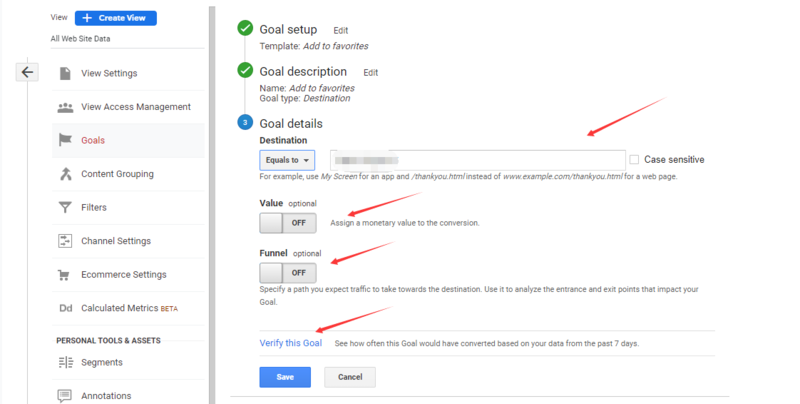
Step 7. Verify Goal
If you want to make sure things are working before you save your Goal, you can hit “Verify this Goal”. Google will then see how many of your visitors over the past seven days have taken actions that would be defined as a conversion.
It’s quick and easy to see if your goal is set up correctly.
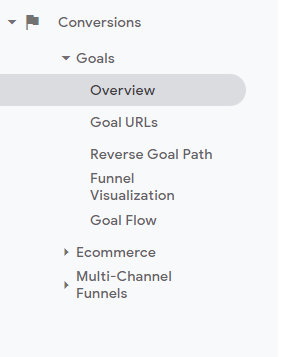
Step 8. Monitor Conversions
There are many ways to monitor conversions. The simplest way is to select “Conversions” and then “Overview in your sidebar.
How to Track Conversions with Google Analytics 4?
In our previous posts, we introduced you to Google Analytics 4 (GA4), how it’s different from Universal Analytics (UA or GA, and the current version of Google Analytics), and how to set it up to run alongside your current analytics platform.
If you’ve recently switched to Google Analytics 4, then you will have noticed that Goals are no longer a viable option to track conversions. Instead, to track and measure key actions on your website, you’ll need to create a custom event in Google Analytics and turn that into a conversion.
In this part, we’ll give you a quick tutorial on setting up conversion tracking with Google Analytics 4.
How to Set Up Google Analytics 4 Conversion Tracking for Already Tracked Events?
Actually you already have built-in tracking in Google Analytics 4:
- click
- first_visit
- page_view
- scroll
- session_start
- view_search_results
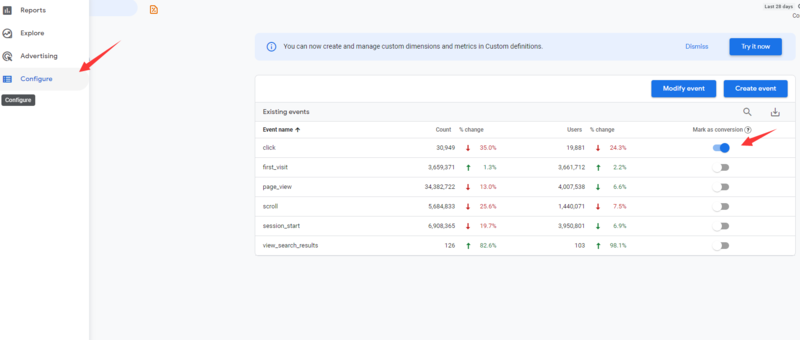
Google Analytics 4 gives you the option to mark any event as a conversion. This is the simplest way to set up conversions for already available tracked events.
Step 1: Click the “Configure” at the left menu in the GA4 interface
Step 2: Click on the “Events” sub-tab
Step 3: Turn on the “Mark as conversion” for desired events (which you want to count as conversions).
That’s it!
How to Set Up Google Analytics 4 Conversion Tracking by Creating a New Event?
If you’re looking to track something a little more involved like specific page encounters, you can create a new event within Google Analytics 4.
Step 1: Click the “Configure” at the left menu in Google Analytics 4.
Step 2: Click on the “Events”.
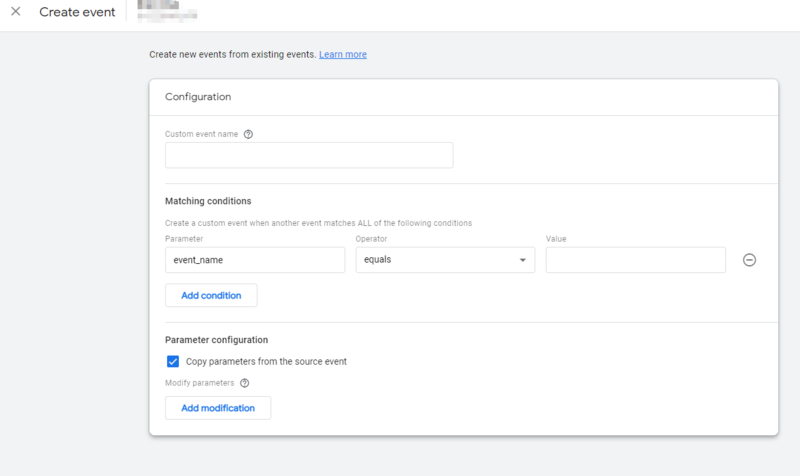
Step 3: Click the “Create Event” button. The new popup with customization settings will open.
Step 4: Give your event a name.
Step 5: Under Matching Conditions, select your parameter from the dropdown.
Step 6. Click “Create”
Ready to Track Your Conversions in Google Analytics?
That’s your basic setup for measuring your site’s conversion rate in Google Analytics. We hope this guide helped you to find out how to use Google Analytics for conversion tracking.
Now, it is your turn to set up conversion tracking in Google Analytics.