Google Optimize Complete Guide for Beginners and Advanced
Contents
In order to improve conversion rate of our website, we all like A/B testing, and Google Optimize is one of the best free A/B testing tool in the market.
If you have any doubts about Google Optimize or even haven’t heard this tool before, this is a guide for you to get to know the tool better.
Like most Google Optimize guides, we’ll show you what is Google Optimize, how to set up Google Optimize, and how to run your first experiment.
Let’s go.
What Is Google Optimize?
Google Optimize is a web-based A/B testing tool that enables you to set-up and run experiments to determine if one element, or version, of your website outperforms another. With this insight, you can create tests that help you quantitatively identify changes to improve your conversion rates and increase revenue.
Google Optimize vs Google Optimize 360
Google Optimize has two versions. One is a free version, and the other one is a paid version. The free version is called Google Optimize, and the enterprise version is known as Google Optimize 360. Both versions are part of the Google Marketing Platform.
Here’s a detailed feature comparison table that shows the differences and similarities between Google Optimize and Google Optimize 360 as indicated by Google support:
| Optimize | Optimize 360 | |
| Made for… | Small to medium-sized businesses getting started with experimentation | Larger enterprises and businesses with more sophisticated testing needs |
| A/B testing | √ | √ |
| Native Google Analytics integration | √ | √ |
| Basic URL targeting | √ | √ |
| User behavior and technology targeting | √ | √ |
| Geo targeting | √ | √ |
| Technical targeting (JavaScript, cookies, data layer) | √ | √ |
| Google Analytics Audience targeting | – | √ |
| Web app support | √ | √ |
| Multivariate testing (MVT) | Up to 16 combinations | Up to 36 combinations |
| Experiment objectives | Up to 3 preconfigured | Up to 10 preconfigured,additional available once started |
| Simultaneous experiments | Up to 5 | More than 100* |
| Simultaneous personalizations | Up to 10 | More than 100* |
| Administration | Basic administration with unlimited users | Analytics 360 Suite administration |
| Implementation services | – | √ |
| Support and services | Self-service help center, community forum and Certified partners | Enterprise-level service, support, and SLAs |
| Payment options | Free | Invoiced monthly |
Google Optimize Test Types
Google Optimize can fulfill your basic needs for website optimization because it runs almost all types of experiments your site may need. Here is a brief explanation for each of them:
1. A/B Test
A/B testing, also known as A/B/n testing, consists of two or more versions of the same webpage or element to know which one performs best in terms of conversions. In the context of A/B testing, an original design is called the control, and the new designs are known as variations.

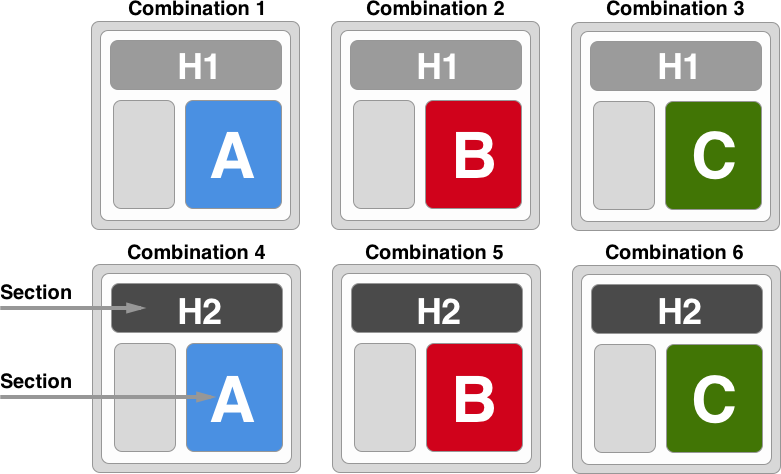
2. Multivariate Test
In multivariate testing (MVT), one can test multiple elements at a time. The idea behind multivariate testing is to determine the best combination of different elements to perform best in conversions. In Google Optimize, your MVT is limited to 16 combinations.
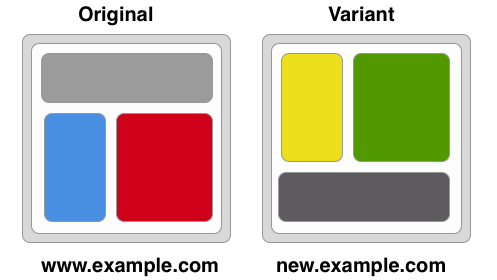
3. Redirect Test
Also known as Split URL testing. Redirect Test is used to test two different web pages against each other, by the help of JavaScript redirect. In Redirect Test, users of one page are randomly redirected to the variation to track how they interact with it. This type of experiment is typically used during the website redesigning process.
Example
Test two different landing pages, with different URLs:
- Original – www.example.com/landing1
- Variant – www.example.com/landing2
4. Personalization
Personalization is used to engage the user by targeting them per the available data you have in your database, such as geographical location, age, device, history on the website, etc. For example, promoting seasonal clothing based on your visitor’s geography or offering free shipping to your best customers. Personalization can help your visitors quickly find what they’re looking for and build loyalty.
Unlike experiments, personalizations can run forever and don’t have variants. They’re a single set of changes served to anyone who meets the targeting conditions.
Optimize allows you to add a banner and make timely updates to your site without having to edit the HTML code or involve your web team.
You can add a banner message at the top of your website with an important update to your customers.
You can select which pages of your site the banner should be shown; for example, you can show a banner on only the homepage or on every page of your site. You can also customize the color, size, and text of the banner.
How to Set Up Google Optimize?
Now, to get started, head to the Google Optimize site and click one of the “Start for free” buttons.
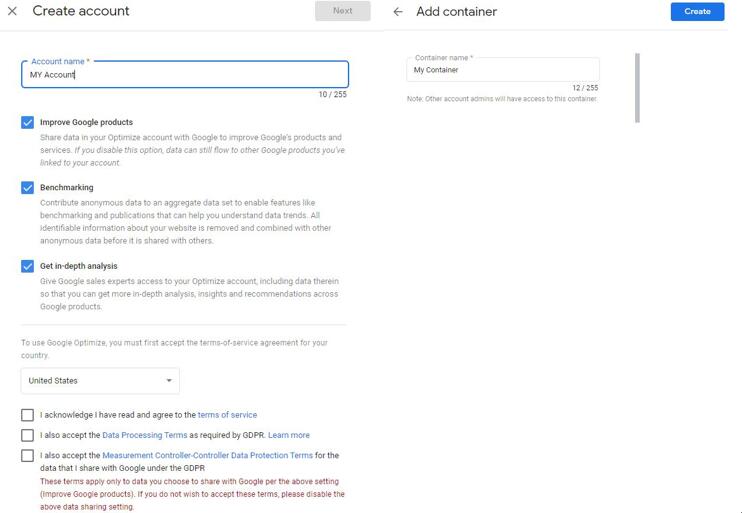
Step 1. Creating an Account and Container
- Click “Create new Account”
- Enter an Account name
- Enter a Container name
- Agree to the Terms of Service
- Click CREATE
The difference between Account and Container:
- Account: the top-level element of Google Optimize. Within Google Optimize, you can see your accounts by going to the “All Accounts” link in the top left corner.
- Container is like a bucket that keeps all your website domains and experiments. Each container has its own unique Container ID that has an alpha-numeric string.
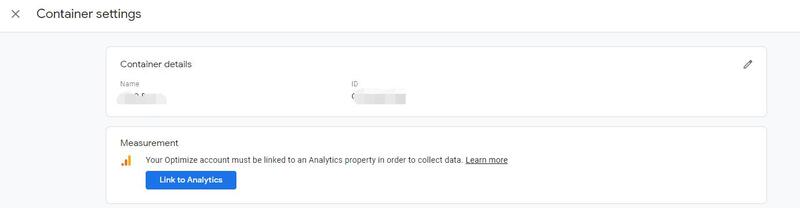
Step 2. Link to Google Analytics
Next, you will need to link your Google Analytics property to collect data. On “Container Settings” click on “Link to Analytics”
You should then see your Google Analytics property. If you have multiple properties attached to your Gmail you will need to choose the one you want to use with Google Optimize. Then click on “Link.”
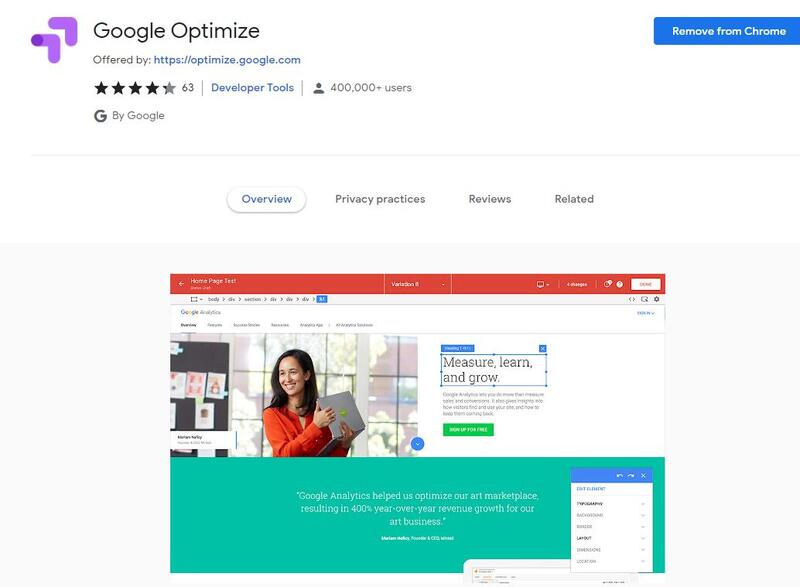
Step 3. Install The Optimize Chrome Extension
Get the Optimize Chrome extension to create experiences in the Optimize visual editor.
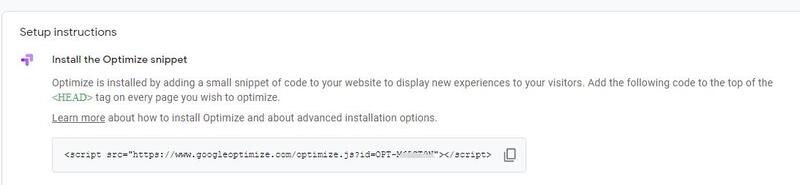
Step 4. Install the Optimize Snippet
Optimize is installed by adding a small snippet of code to your website to display new experiences to your visitors. You can directly add the code to the top of the <HEAD> tag on every page you wish to optimize. You can also install Optimize with Google Tag Manager.
How to Use Google Optimize?
Once you are set up in Google Optimize, it is time to select the upper right button “Create Experience” to set up your test and choose parameters.
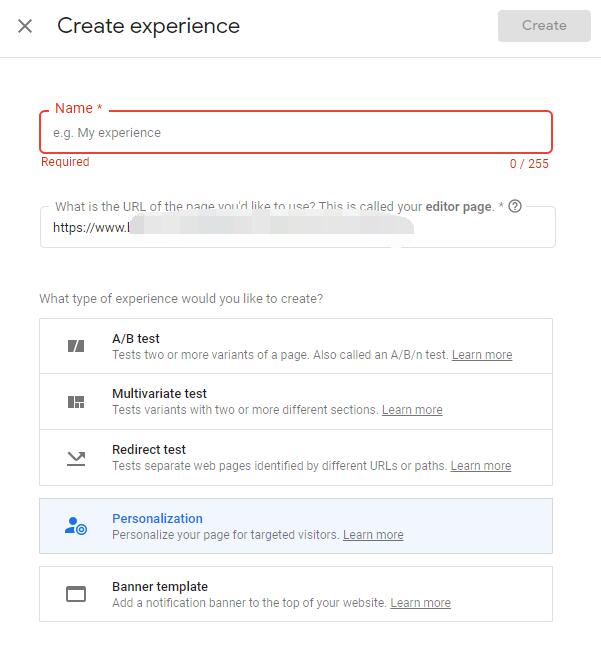
Step #1: Create a New Experiment Experience
Click “Create experience”. Then, name your experience something that has not been previously used, and be sure to include information that will distinguish it from other tests you may run. Underneath the name, you will include the URL of the page you will be testing, called your editor page.
Next, you will select which type of test you would like to create between A/B, Multivariate, Redirect, Personalization or Banner template.
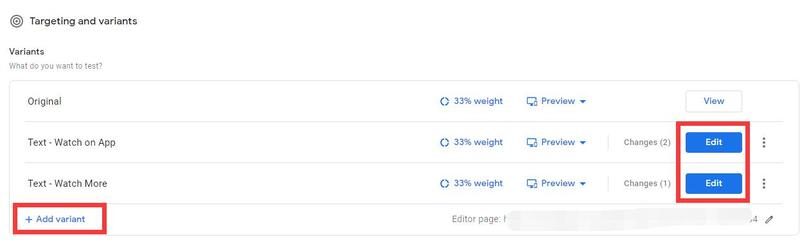
Step #2: Create and Edit Variants
Now, you need to set up the change you want to make on your site by selecting the blue “Add variant” button. Next, choose a name and select “edit” next to your new variant.
This is the part where you can start making changes to your site that you want to test against the original. The editor allows you to change copy, element order, style colors, and more in a few simple steps.
The visual editor supports six change types:
- Style changes – Digital marketers can change the sizing and positioning of elements on the page.
- Attribute changes – Attribute changes include things like changing the destination URL of a hyperlink or replacing an image with one from a different source.
- Text changes – Marketers can edit any text on the page for a Google Optimize content experiment, including sales copy and calls-to-action.
- HTML changes – The Google Optimize visual editor supports HTML changes, allowing marketers to replace page elements with HTML code or insert HTML code directly into a target page element.
- Reorder changes – Marketers can use Google Optimize drag-and-drop functionality to reorder similar elements on the page, such as navigation menu items.
- Script changes – Marketers can configure JavaScript to run on the page.
At this stage, you will also determine what proportion of test visitors will see the variation experience.
Step #3: Select Your Audience
Once the variant is set that you would like to test, the next step is to determine who will see the experience. You can set it to appear to all users who visit your site or customize it so that only certain users encounter it.
Step #4: Choose the Objective
When it comes to choosing an objective or what you want to measure, there are two options. You can either choose from a list of your current Google Analytics Goals or create a custom objective. Custom objectives are useful when the goal of your test doesn’t correspond to a GA goal.
Step #5: Finalize Settings
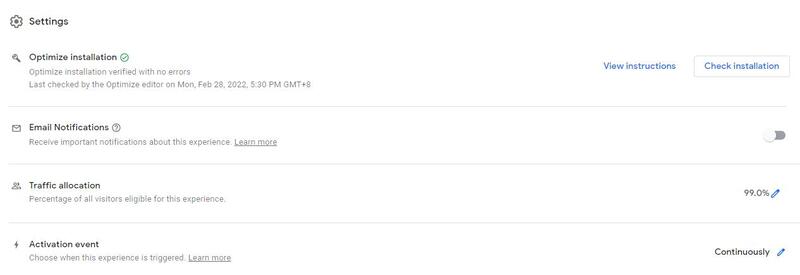
Before you launch your test, select your desired settings.
- First, check that Optimize is correctly installed by clicking the “Check Installation” button.
- Next, we recommend turning on email notifications so you can receive updates about the experience without logging in to check in as often.
- Then, select the percentage of visitors to your site who will see the experiment.
- Finally, choose an event where the test gets triggered between pageload, continuously, or on a custom event. Pageload is most common and the default option. Continuous activation is a good option for tests on dynamic pages as it will apply the variation’s changes to newly matching elements as they load. A custom event can be used when the event helps determine the test’s audience.
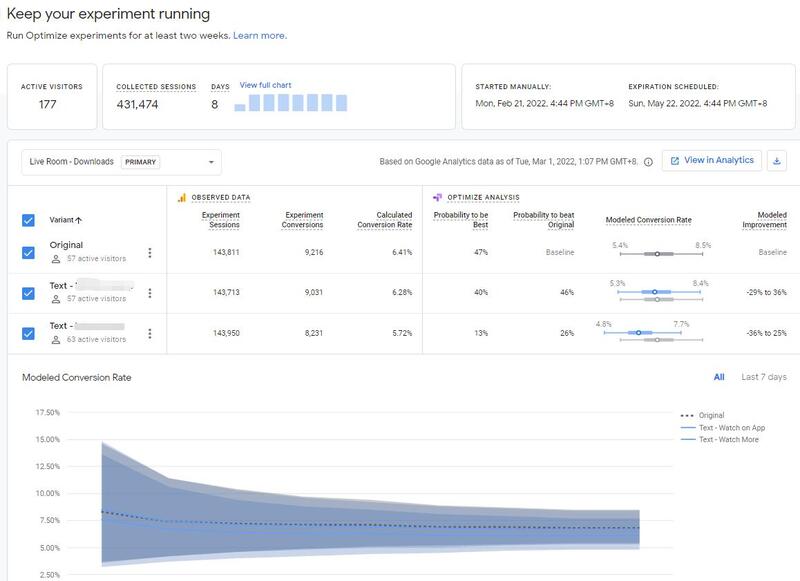
Step #6: Run Your Test and Monitor Performance
Once all of the variants, targeting, and settings are in place, it is time to click the “Start” button. Then, you need to monitor your test’s performance throughout the experiment to ensure that nothing is broken.
After your test has been running long enough, you can often (not always) start to see a pattern. One way to see how a test is performing is by looking at the “Probability to be Best” section under “Reporting.” If the percentage is 90 or above, it indicates a strong likelihood of becoming the winner over time.
Google Optimize Recap
Now that we’ve walked through Optimize overall, we hope this article gives you enough information about Google Optimize and helps you improve your website’s conversion rate as soon as possible.
What are you waiting for? Try it right now!
Happy Optimizing!